In this lab, you will create virtual machines using Google Cloud Compute Engine. Compute Engine allows you to run both Linux and Windows machines. It is easy to connect to machines to administrate them and it is easy to control how those machines are created.
There are many options available when creating VMs. These include zone, operating system, number of CPUs, amount a RAM, and many others. In this lab, you will see how to control those options from both the web console and from the command line.
What you need
To complete this lab, you need:
- The latest version of Google Chrome
- A Google Cloud Platform account and project
What you learn
In this lab, you will:
- Create Linux virtual machines
- Connect to Linux machines with SSH and install software
- Create Windows virtual machines
- Connect to Windows machines with RDP
- Use the CLI to create and manage virtual machines
Step 1
Log onto the Google Cloud Platform web console at http://console.cloud.google.com.
Select a project to use for this lab, or create a new project now. If you don't know how to create a project, see the lab Getting Started with GCP.
Step 2
From the Products and Services menu, choose Compute Engine. Click the Create instance button to create a virtual machine.
If this is the first time you have gone to the Compute Engine service in your project, it may take a couples minutes for it to be set up.
Step 3
Give your instance the name linux-server, and select any zone you wish.
Click the Machine type dropdown. Select a different machine type and notice the estimate monthly cost is updated. Select a few machine types to see the costs.
Finally, choose the smallest machine available.
In the Boot disk section, click the Change button. Take a look at the various options you have for operating system. Also, note that you could change the disk size here.
Leave the default operating system (Debian) selected and then click the Select button.
Check the checkbox to Allow HTTP traffic.
Leave all the other options at their default values and click Create.
Step 4
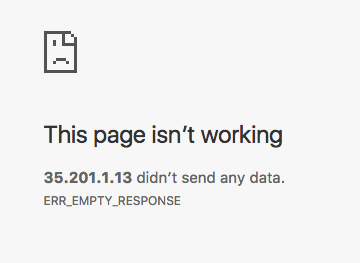
When the machine is ready, click the External IP displayed for the server. This should open a new browser tab and try to connect to the server just launched.
You will get an error that the page is not available. This is because the instance is not running a web server. Leave this browser tab open.
Step 5
Switch back to the browser tab displaying the GCP console. Click the SSH button to log into it. It will take a minute or so to connect.
Also, beware that your browser's popup blocker might block the SSH window. If it does, just click the SSH button again and you also might have to approve the popup.
Step 6
At the SSH command prompt, type (or paste) the following two commands to install the Apache Web server.
sudo apt-get update
sudo apt-get install -y apache2
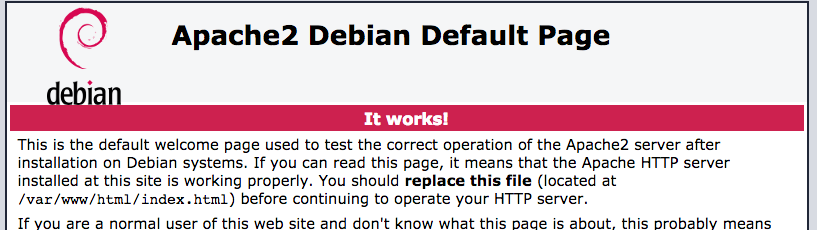
Step 7
Switch back to the web browser tab that was opened to display the external IP of the instance (the one with the error) and reload the page. You should now see the default page for the Apache Web server just installed.
Step 1
Go back to the tab displaying the GCP Compute Engine page. Click the Create instance button again to create another virtual machine.
Name it windows-server and select any zone in us-central1. This time select in the Boot disk section, click the Change button, and select whatever the latest version of Windows is.
Leave everything else at their default values and click Create.
Step 2
When the machine is created, click the dropdown arrow next to the RDP button and select Create or reset Windows password. In the resulting dialog, make note of your username and then click Set.
Copy the password to the clipboard and then paste it in a text file so you don't lose it.
Step 3
Close the password dialog and then click the RDP button. When prompted, enter your password and click OK. If you get a warning regarding the certificate, click the Continue button.
Step 4
You should be logged on to your Windows machine. At this point, Administering this machine would be like any other Windows machine. Explore your Windows machine and when finished, close the RDP window.
Step 1
Return the the web console and the Compute Engine service.
In the upper right of the toolbar, there is an icon that looks like a command prompt to activate the Google Cloud Shell. Click that icon.
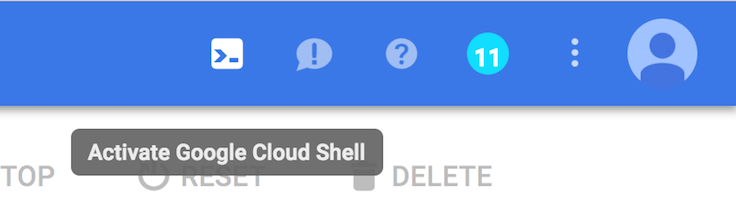
This opens a command window at the bottom of the browser. It will take a minute for that window to initialize.
Step 2
In Cloud Shell, enter the following command. Give it a couple seconds and then click the Refresh button VM Instance page (not the browser's refresh button).
gcloud compute instances create test-server-1 --zone=us-central1-b
Step 3
A machine called test-server-1 should appear in your list of virtual machines.
Step 4
Type the following command into Cloud Shell.
gcloud compute instances list
You should see your machines.
Step 5
Click the Create Instance button. Set the name to test-server-2.
Choose the zone us-central1-b.
Change the boot disk to a Windows machine.
Check the boxes to allow HTTP and HTTPS traffic.
DO NOT click the Create button. Instead, click the command line link at the bottom. Copy the command and then paste it into Google Cloud Shell and run it.
Step 6
Click the Cancel button to return to your VM instances page. Click the Refresh button to see your new server.
Step 7
Enter the following command to delete the instance you just created. When prompted, say Yes.
gcloud compute instances delete test-server-2 --zone=us-central1-b
Step 8
Experiment with creating different machines and connecting to them. Remember, you are paying for these, so don't create huge machines and don't forget to delete them when finished.
Step 1
Delete all the machines you have created.
As long as they are running, they cost something. Check each one and click the Delete button.

This lab was provided by ROI Training.
To learn more about GCP infrastructure, check out the course: Architecting with Google Cloud Platform: Infrastructure.
Check out some related courses:
Please click the link below and give us some feedback on this lab. You will automatically be entered to win a new Google Home.